A hanging indent is when the first line of a paragraph sits flush left and the remaining lines are indented — commonly used for bibliographies, reference lists, and citations. Google Slides doesn't have a one-click "hanging indent" button, but it's easy to create manually. This guide shows you how to make a hanging indent in Google Slides, step by step.

- Quickest method: place your cursor at the start of the second line → press Tab. This indents the remaining lines while leaving the first line flush.
- For precise control: Format → Align & indent → Indentation options → set "Special indent" to Hanging.
- Below: both methods step by step, with visuals for bibliography formatting.
What Is a Hanging Indent?
A hanging indent (also called a second-line indent) formats a paragraph so that the first line starts at the left margin, and all subsequent lines are indented. It looks like this:
Smith, J. (2024). The impact of AI on education.
Journal of Technology, 15(3), 45–60.
It's the standard format for APA, MLA, and Chicago-style reference lists and bibliographies.
Method 1: Using Indentation Options (Recommended)
- Click inside the text box that contains your paragraph.
- Select the paragraph(s) you want to format.
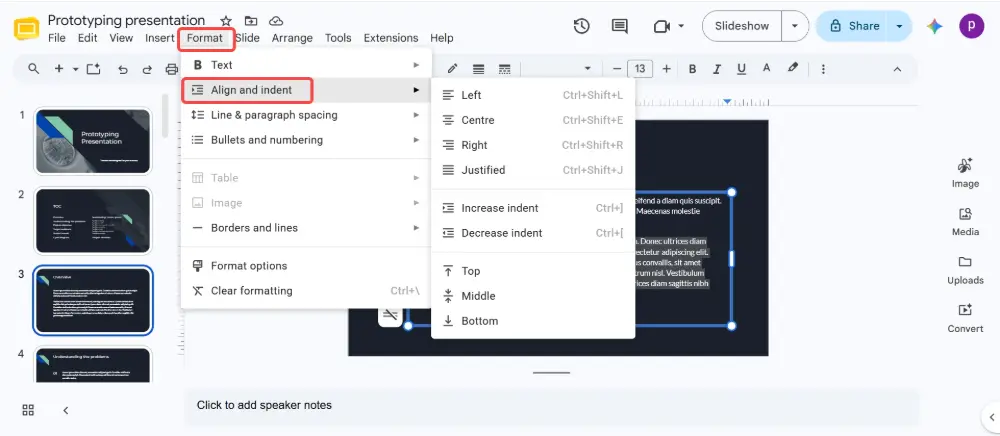
- Click Format (in the menu bar) → Align & indent → Indentation options.
- In the dialog box, find "Special indent".
- Change the dropdown from "None" to "Hanging".
- Set the indent amount (default is 0.5 inches — this works for most bibliographies).
- Click Apply.
The first line stays flush left; all subsequent lines indent by the amount you set. This method is precise and consistent.
Method 2: Using the Ruler
- Click inside the text box.
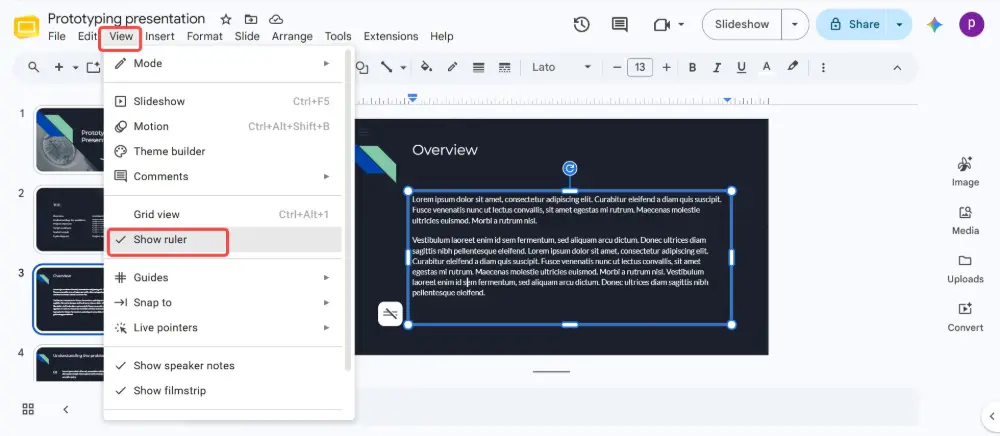
- If the ruler isn't visible: View → check Show ruler.
- On the ruler, you'll see two small markers on the left side — a downward triangle (first-line indent) and an upward triangle (left indent).
- Drag the upward triangle (left indent marker) to the right — to about 0.5 inches.
- Then drag the downward triangle (first-line indent marker) back to the left margin (0 inches).
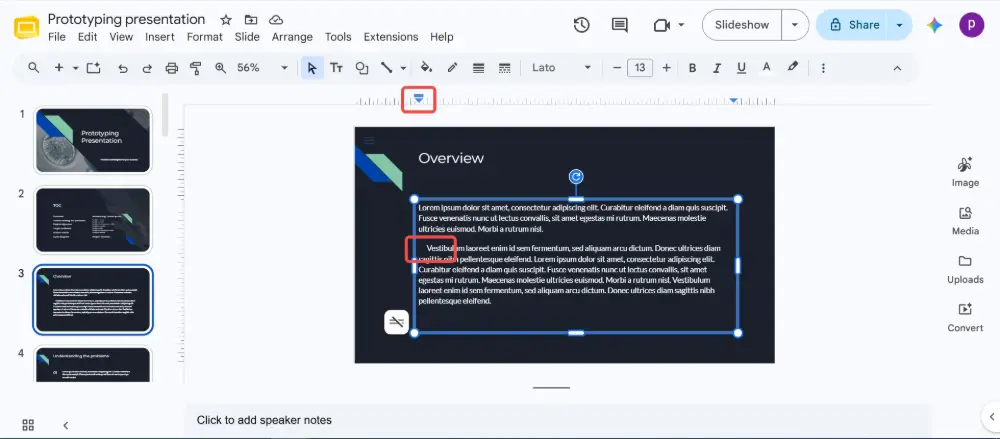
- The result: first line at the margin, remaining lines indented.
The ruler method takes some practice — the two triangle markers are small and easy to confuse. If you accidentally move both at once, press Ctrl+Z (Cmd+Z on Mac) to undo and try again. Method 1 (Format menu) is more reliable for first-time users.
Method 3: Quick Tab Method
- Type your paragraph normally.
- Place your cursor at the beginning of the second line (the line that should be indented).
- Press Tab.
- Repeat for each continuation line.
This is the fastest approach for a few entries, but it's manual — if your text reflows (due to resizing the text box), the tabs won't adjust automatically. For reference lists with many entries, use Method 1.
Hanging Indent: Google Slides vs. Google Docs vs. PowerPoint
| Tool | How to create a hanging indent |
|---|---|
| Google Slides | Format → Align & indent → Indentation options → Special indent → Hanging. Or use the ruler markers. |
| Google Docs | Same: Format → Align & indent → Indentation options → Special indent → Hanging. Easier because Docs is designed for long-form text. |
| PowerPoint | Select text → Home → Paragraph dialog launcher (small arrow) → Special → Hanging. Set the indent amount. |
| Word | Select text → Home → Paragraph dialog → Special → Hanging. Or: Ctrl+T as a shortcut. |
When to Use a Hanging Indent in Presentations
- Reference / bibliography slide: APA, MLA, and Chicago formats require hanging indents for citations.
- Works Cited slide: academic presentations with a final references slide.
- Glossary or definitions: the term on the first line, the definition indented below.
- Legal citations: court cases, statutes, and regulatory references.
💡 Pro tip: If formatting citations and references in slides is eating your time, try building your presentation in Gamma.com.ai — the AI handles layout and formatting automatically, so you can focus on your content instead of indentation settings.
Conclusion
To create a hanging indent in Google Slides: Format → Align & indent → Indentation options → set Special indent to "Hanging." That's the most reliable method. Alternatively, use the ruler markers or the Tab key for quick fixes. Hanging indents are mainly used for bibliography and reference slides — for everything else, standard paragraph formatting works fine.
FAQs
How do I make a hanging indent in Google Slides?
Select the text → Format → Align & indent → Indentation options → change Special indent to "Hanging" → set the amount (0.5 inches is standard) → Apply. The first line stays flush; all other lines indent.
Is there a shortcut for hanging indent in Google Slides?
No keyboard shortcut exists for hanging indent in Google Slides. The fastest path is Format → Align & indent → Indentation options. For a quick manual fix, you can place your cursor at the start of the second line and press Tab.
How is a hanging indent different from a regular indent?
A regular (first-line) indent pushes the first line to the right while the rest stays at the margin. A hanging indent does the opposite: the first line is at the margin, and all subsequent lines are indented. Hanging indents are used for citations and bibliographies.
Can I apply a hanging indent to multiple paragraphs at once?
Yes — select all the paragraphs you want to format, then apply the hanging indent through Format → Indentation options. The setting applies to every selected paragraph at once.
Why do I need a hanging indent?
APA, MLA, and Chicago citation styles require hanging indents for reference lists. It makes it easy to scan entries — the author's name (first line) stands out, and the remaining details are indented underneath.