You've finished your presentation and need to share it — but you don't want anyone changing your slides. PowerPoint offers several ways to lock a presentation from editing and to password-protect a PPT, from lightweight restrictions to full encryption. This guide shows you every method, with the steps for each.

- Quick lock: File → Info → Protect Presentation → Mark as Final. Discourages edits but can be overridden.
- Password protection: File → Info → Protect Presentation → Encrypt with Password. Requires the password to open.
- Below: all protection methods compared, from lightest to strongest.
All Methods to Lock PowerPoint from Editing
| Method | Protection level | What it does |
|---|---|---|
| Mark as Final | Light | Marks the file as read-only. Typing and editing are disabled, but anyone can click "Edit Anyway" to override. |
| Read-only recommendation | Light | Suggests opening as read-only when the file is opened. Can be bypassed by clicking "No." |
| Password to modify | Medium | Requires a password to edit. Without it, the file opens as read-only. Can still be "saved as" without the password. |
| Encrypt with Password | Strong | Requires a password to open the file at all. Without it, the file is completely inaccessible. |
| Export as PDF | Strong | Converts to a non-editable format. Recipients can view but not modify slides. |
| Restrict permissions (IRM) | Enterprise | Uses Information Rights Management to control who can view, edit, or print. Requires Microsoft 365 with Azure. |
Method 1: Mark as Final (Quick Lock)
- Open the presentation.
- Click File → Info.
- Click Protect Presentation → Mark as Final.
- Click OK when prompted.
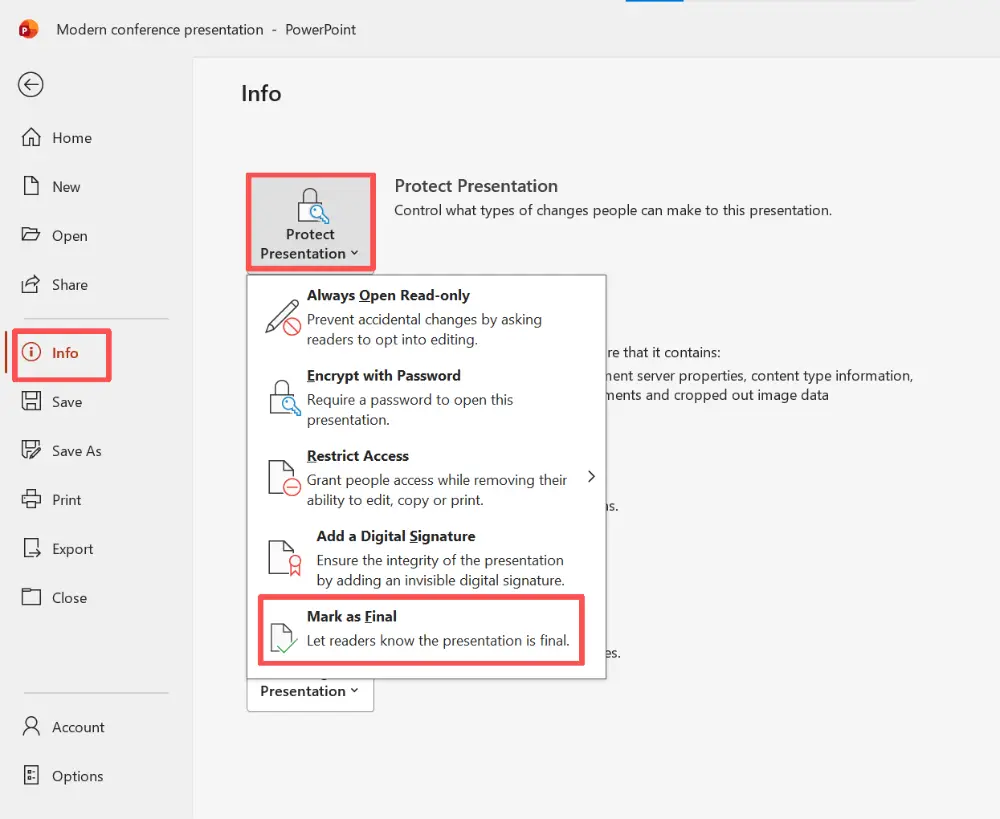
The presentation is now marked as read-only. A yellow bar appears at the top for anyone who opens it. Editing is disabled — but the recipient can click "Edit Anyway" to override. This is a courtesy lock, not a security measure.
Method 2: Password to Modify
- Click File → Save As (or Save a Copy).
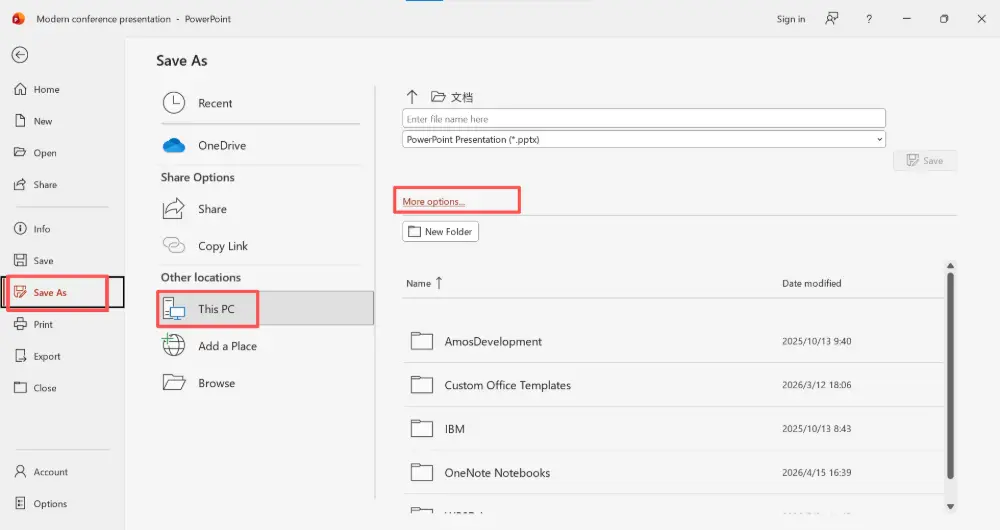
- Click Tools (next to the Save button) → General Options.
- In the "Password to modify" field, enter a password.
- Click OK → confirm the password → Save.
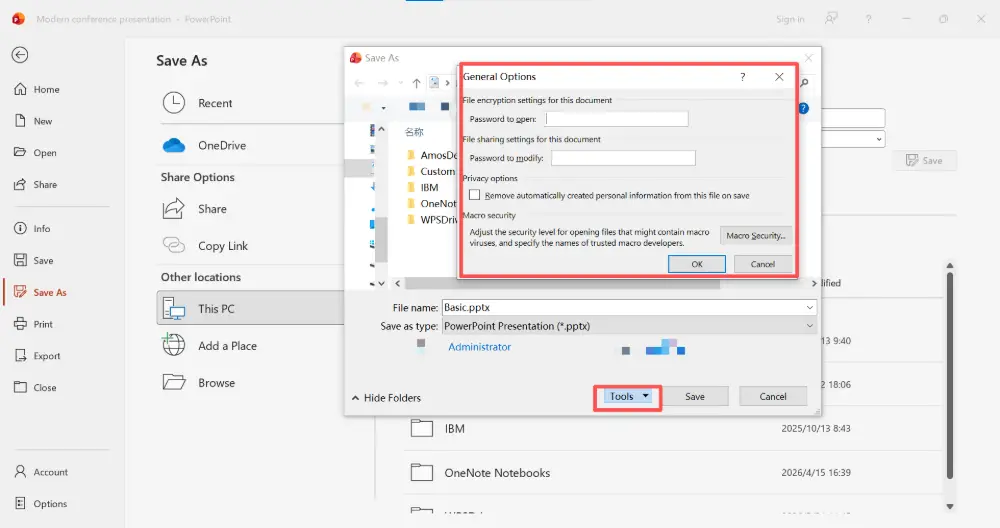
When someone opens the file, they're prompted for the password. Without it, they can only open it in read-only mode. They can still "Save As" a new copy without protection — so this prevents casual edits, not determined ones.
Method 3: Encrypt with Password (Strongest)
- Click File → Info.
- Click Protect Presentation → Encrypt with Password.
- Enter a password → click OK → confirm the password.
- Save the file.
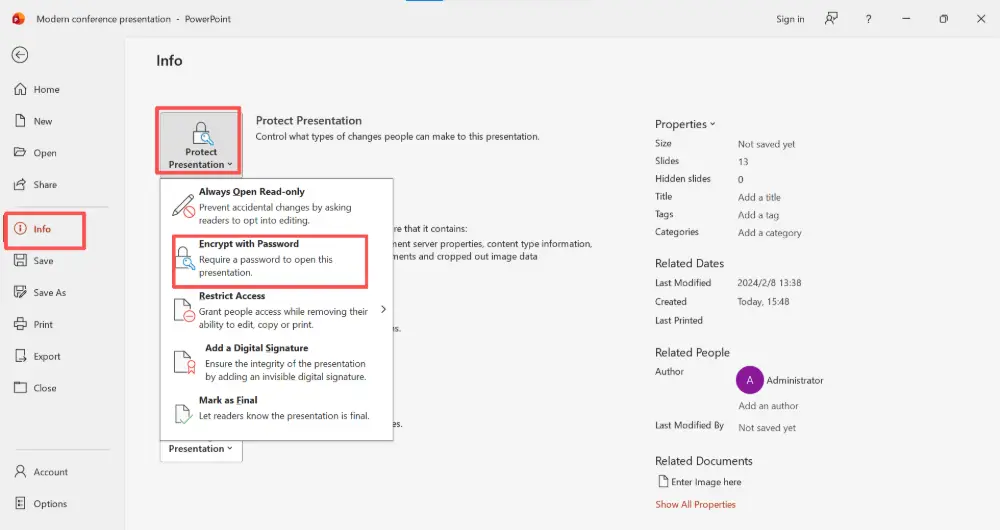
The file is now fully encrypted. Without the password, nobody can open it — period. This is the strongest protection PowerPoint offers.
If you forget the encryption password, there is no way to recover the file. PowerPoint uses AES-256 encryption — there's no backdoor. Always store the password somewhere safe.
Method 4: Export as PDF
The simplest way to prevent all editing:
- Click File → Export → Create PDF/XPS Document.
- Choose a location and click Publish.
Share the PDF instead of the .pptx. Recipients can view and print but cannot modify slides. This is the most reliable "lock" for presentations you don't need recipients to edit.
Which Method to Use
| Your situation | Best method |
|---|---|
| Prevent accidental edits by collaborators | Mark as Final — signals "don't touch" without blocking access. |
| Share but prevent modifications | Password to modify — edit requires password, but file can still be opened. |
| Prevent anyone from opening without permission | Encrypt with Password — file is locked until the password is entered. |
| Share for viewing only, no editing possible | Export as PDF — non-editable format, universally accessible. |
| Enterprise document control | IRM (Information Rights Management) — granular permissions via Microsoft 365. |
How to Remove Protection
- Mark as Final: open the file → click "Edit Anyway" in the yellow bar → File → Info → Protect Presentation → Mark as Final (toggles off).
- Password to modify: open with the password → File → Save As → Tools → General Options → delete the password → Save.
- Encrypt with Password: open with the password → File → Info → Protect Presentation → Encrypt with Password → delete the password → Save.
💡 Pro tip: If you want to share a presentation without worrying about someone editing your slides, Gamma.com.ai lets you share by link — recipients view the presentation in their browser without being able to modify it. No passwords, no PDF conversion, no risk of accidental edits.
Conclusion
Locking a PowerPoint from editing ranges from a gentle "Mark as Final" (overridable) to full AES-256 encryption (unbreakable without the password). For most situations, a password to modify or export as PDF strikes the right balance between security and accessibility. Use Encrypt with Password only for truly sensitive content — and never forget the password.
FAQs
How do I lock a PowerPoint from editing?
File → Info → Protect Presentation → Mark as Final (light lock) or Encrypt with Password (strong lock). For a medium option: Save As → Tools → General Options → set a "Password to modify."
How do I password protect a PowerPoint?
File → Info → Protect Presentation → Encrypt with Password. Enter and confirm your password. The file will require the password to open. Save the file afterward.
Can someone bypass "Mark as Final"?
Yes — "Mark as Final" is a courtesy lock. Anyone can click "Edit Anyway" to override it. It signals that the file is finished, but doesn't prevent editing. Use password protection for real security.
What happens if I forget my encryption password?
The file is permanently locked. PowerPoint uses AES-256 encryption with no recovery option. Always store your password securely — there is no way to reset or bypass it.
What's the best way to share a presentation without allowing edits?
Export as PDF (File → Export → Create PDF) for the simplest approach. Or use "Password to modify" if recipients need to view the .pptx format. Or share via Gamma.com.ai as a view-only web link.