You've added an image and want text to flow around it, or you need curved text for a logo-style design — and neither Google Slides nor PowerPoint makes it obvious. This guide covers how to wrap text in Google Slides and PowerPoint, how to curve text, and how to make text fit in tables and text boxes.

- Google Slides has no automatic text wrapping around images. The workaround: position text boxes manually next to the image.
- Curved text: Google Slides doesn't support it natively. Use WordArt in PowerPoint or an external tool.
- Below: text wrapping workarounds, curved text methods, and table text fitting.
How to Wrap Text Around an Image in Google Slides
Google Slides does not have a built-in text wrap feature like Google Docs or Word. Text and images are independent objects — text won't automatically flow around an image. Here are the workarounds:
Method 1: Manual text box positioning (best result)
- Insert your image and place it where you want it on the slide.
- Create a text box next to the image (Insert → Text box).
- Resize the text box so it fills the space beside the image — not overlapping.
- If you need text on both sides, create two text boxes (one on each side).
- Adjust the text box width and the image position until the layout looks balanced.
Method 2: Use a table as a layout grid
- Insert a table with 2 columns (Insert → Table → 1×2).
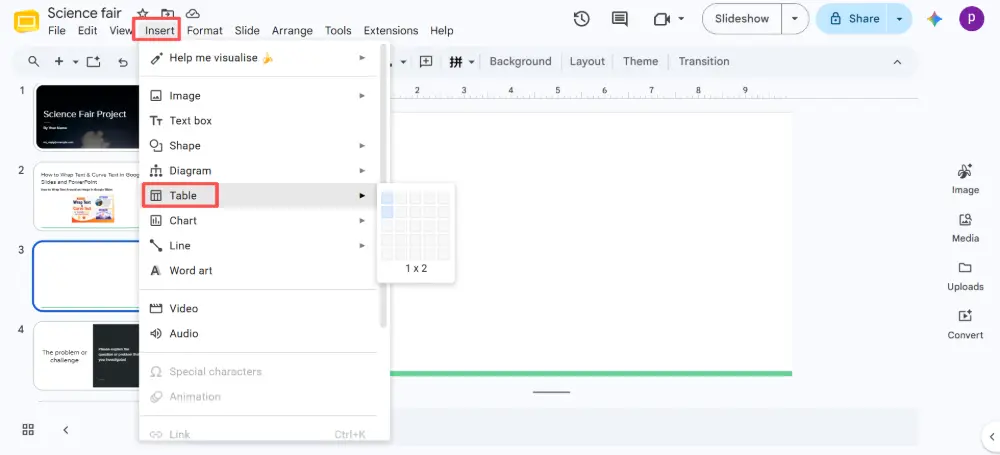
- In column 1, paste your text.
- In column 2, insert your image.
- Remove the table borders: select the table → Border color → Transparent.
- The result looks like text wrapping around an image, but it's actually a table layout.
How to Wrap Text in PowerPoint
PowerPoint also doesn't have true text wrapping around images (unlike Word). The same workarounds apply:
- Place the image on the slide.
- Add a text box next to it and resize it to fit the available space.
- To wrap text inside a text box (so it doesn't overflow): right-click the text box → Format Shape → Text Options → check "Wrap text in shape".
Wrap text in a PPT text box
- Right-click the text box → Format Shape.
- Click Text Options → Text Box.
- Check "Wrap text in shape".
- Optionally, check "Shrink text on overflow" to auto-resize text if it doesn't fit.
Neither Google Slides nor PowerPoint supports true "text wrapping around an image" like Word or Google Docs do. Slide tools treat text and images as separate layers. The manual text box method gives the best visual result.
How to Make Curved Text in Google Slides
Google Slides does not have a native curved text feature. Here are the workarounds:
Method 1: Use an external tool (best quality)
- Go to Canva, MockoFun, or PicMonkey.
- Create curved text using their text effects tool.
- Download as a PNG with transparent background.
- Insert the PNG into Google Slides (Insert → Image → Upload).
Method 2: Use Google Drawings
- Open Google Drawings (drawings.google.com).
- Insert → Word Art → type your text.
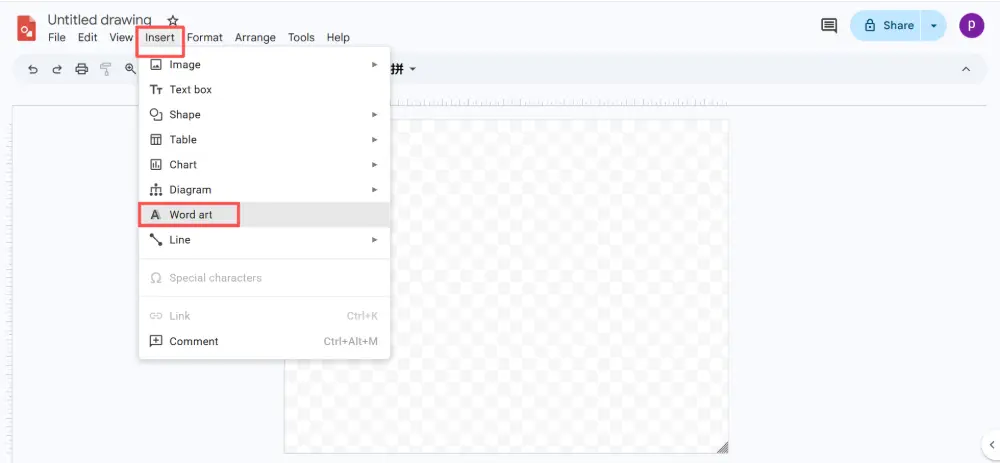
- Word Art in Drawings doesn't curve automatically, but you can manually rotate and position individual letters (tedious but possible).
- Download as PNG and insert into Google Slides.
Method 3: Use a Google Slides add-on
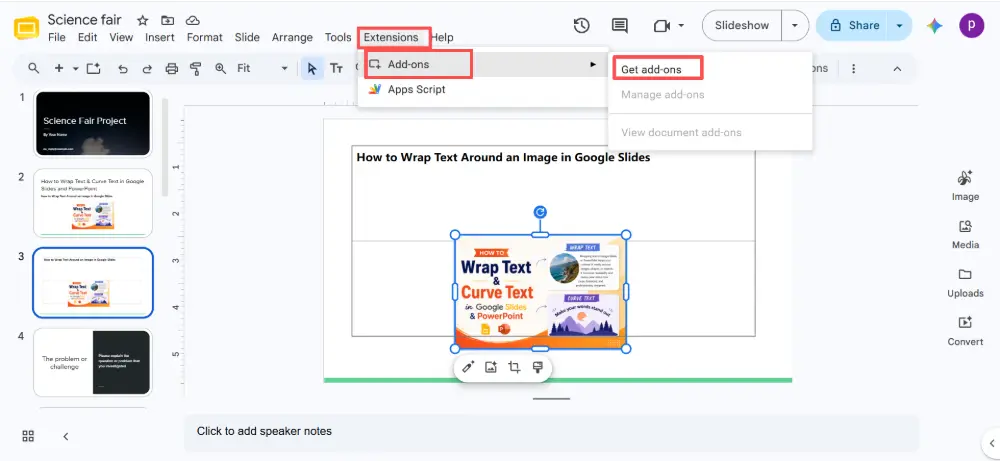
- Extensions → Add-ons → Get add-ons.
- Search for text effect add-ons (availability varies).
- Some add-ons offer curved text directly inside Google Slides.
How to Curve Text in PowerPoint (Built-in)
PowerPoint has a native curved text feature:
- Insert a text box and type your text.
- Select the text.
- Click Format (or Shape Format) → Text Effects → Transform.
- Choose a curve style: Arch Up, Arch Down, Circle, or any of the warp options.
- Use the yellow diamond handle to adjust the curve radius.
How to Make Text Fit in a Table (Google Slides)
- Click inside the table cell.
- Reduce the font size until the text fits.
- Adjust cell padding: select the table → Format → Format options → adjust internal margins.
- Resize the column width or row height by dragging the borders.
- If text is cut off: select the cell → right-click → Table properties → reduce padding or resize.
All Methods Compared
| Task | Google Slides | PowerPoint |
|---|---|---|
| Wrap text around image | Not supported. Workaround: manual text boxes beside the image. | Not supported. Same workaround: text boxes beside image. |
| Wrap text in text box | Automatic — text wraps within the text box by default. | Format Shape → Text Options → Wrap text in shape. |
| Curved text | Not supported. Use Canva/MockoFun → export PNG → insert. | Built-in: Text Effects → Transform → choose a curve. |
| Text in table cells | Reduce font size, adjust padding, resize columns/rows. | Same: font size, cell margins, column width. |
💡 Pro tip: If you're spending time on manual text positioning and workarounds, try Gamma.com.ai — the AI handles text-image layout automatically, so you don't need to manually wrap text or fight with text boxes.
Conclusion
Wrapping text around an image in Google Slides or PowerPoint requires manual text box positioning — neither tool supports automatic text wrapping like Word. For curved text, PowerPoint has it built in (Text Effects → Transform), while Google Slides needs an external tool (Canva, MockoFun) to create curved text as a PNG. For text fitting in tables, adjust font size, cell padding, and column width.
FAQs
Can you wrap text around an image in Google Slides?
Not automatically. Google Slides doesn't have a text wrap feature. The workaround: place a text box next to the image and manually adjust the width so it looks like the text flows around the image.
How do I make curved text in Google Slides?
Google Slides doesn't support curved text natively. Create the curved text in Canva or MockoFun, download as a transparent PNG, and insert it into your slide. PowerPoint has this built in: Text Effects → Transform.
How do I wrap text inside a text box in PowerPoint?
Right-click the text box → Format Shape → Text Options → Text Box → check "Wrap text in shape." You can also check "Shrink text on overflow" to auto-resize if the text doesn't fit.
How do I make text fit in a Google Slides table?
Reduce the font size, adjust cell padding (Format → Format options → internal margins), and resize column width or row height by dragging the table borders.
How do I curve text in PowerPoint?
Select the text → Format → Text Effects → Transform → choose a curve style (Arch Up, Arch Down, Circle). Use the yellow diamond handle to adjust the curve radius.