Word Art in Google Docs and Google Slides turns plain text into stylized, colorful, eye-catching graphics — great for titles, logos, posters, and decorative headings. Both tools have a built-in Word Art feature, but they work slightly differently. This guide shows you how to use Word Art in Google Slides and Google Docs, with customization options.

- Google Slides: Insert → Word art → type your text → press Enter. Then customize font, color, and border.
- Google Docs: Insert → Drawing → + New → Actions → Word art → type → press Enter → Save and Close.
- Below: step-by-step for both tools, customization options, and tips.
How to Use Word Art in Google Slides
- Open your presentation in Google Slides.
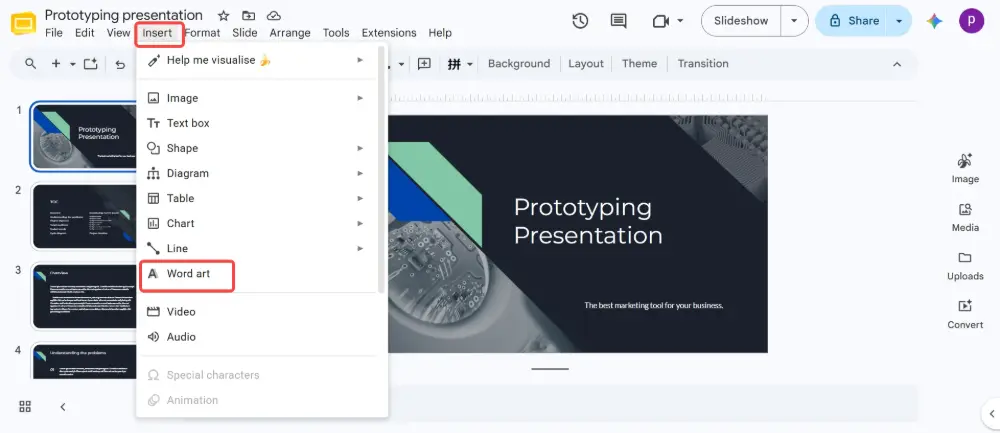
- Click Insert → Word art.
- A text input box appears at the top of the screen.
- Type your text and press Enter.
- The Word Art appears on the slide as a stylized text object.
Customizing Word Art in Google Slides
Click on the Word Art to select it, then use the toolbar options:
| Customization | How to do it |
|---|---|
| Font | Select the Word Art → change the font in the toolbar dropdown. All Google Fonts are available. |
| Fill color | Select → click the Fill color (paint bucket) icon → choose a solid color, gradient, or custom color. |
| Border color | Select → click the Border color (pencil) icon → choose the outline color. |
| Border weight | Select → click Border weight → choose thickness (1px, 2px, 3px, etc.). |
| Bold / Italic | Select → Ctrl+B (bold) or Ctrl+I (italic). Works on the entire Word Art. |
| Size | Drag the corner handles to resize. Hold Shift to maintain proportions. |
| Rotation | Drag the circular handle above the Word Art to rotate to any angle. |
| Shadow / Reflection | Right-click → Format options → Drop shadow or Reflection → toggle on and adjust. |
How to Do Word Art in Google Docs
Google Docs doesn't have a direct "Insert → Word Art" option. You access it through the Drawing tool:
- Open your document in Google Docs.
- Click Insert → Drawing → + New.
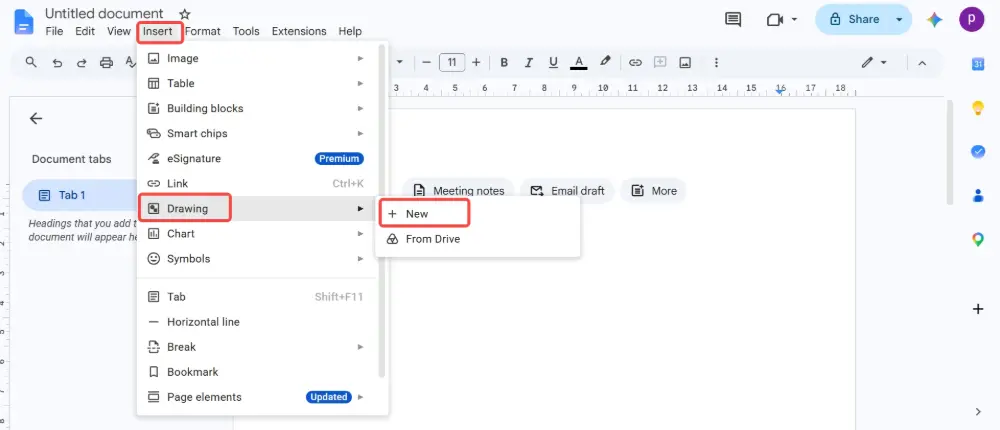
- In the Drawing editor, click Actions (top-left menu) → Word art.
- Type your text in the input box → press Enter.
- The Word Art appears in the drawing canvas.
- Customize: change fill color, border color, font, size (same options as Google Slides).
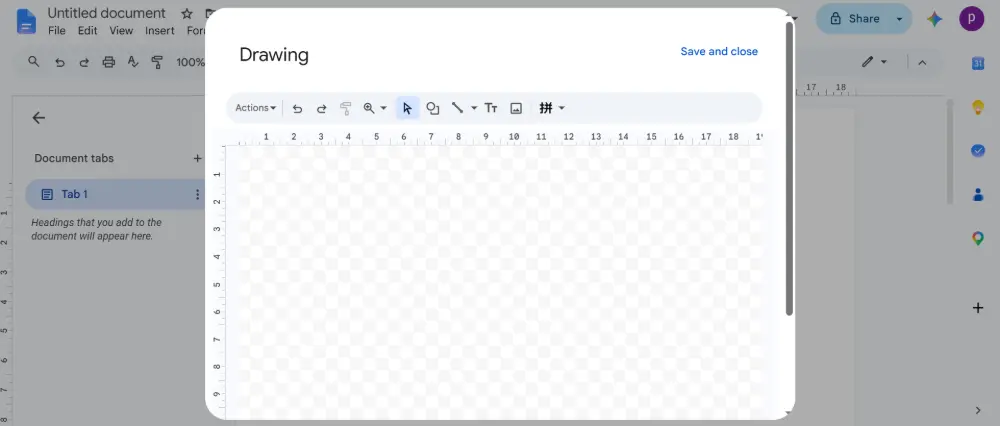
- Click Save and Close to insert the Word Art into your document.
Editing Word Art after insertion (Google Docs)
To edit existing Word Art in Google Docs:
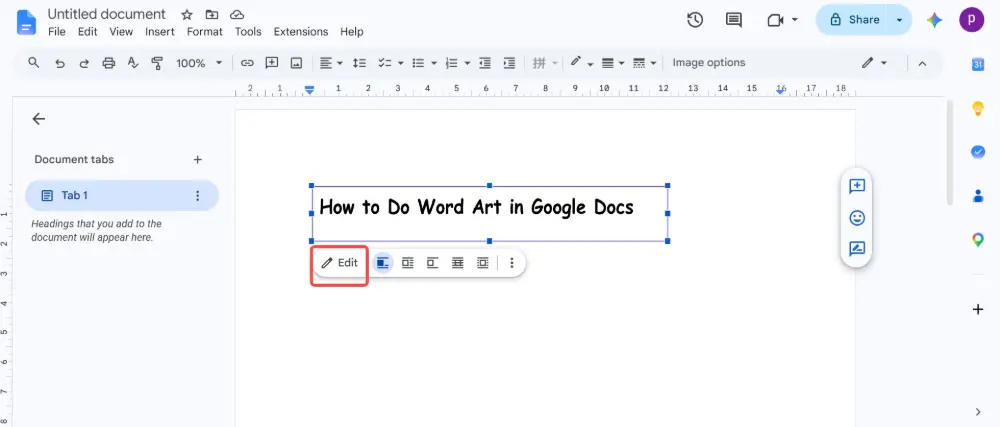
- Click on the Word Art in your document.
- Click Edit (the pencil icon that appears below the drawing).
- The Drawing editor reopens — make your changes.
- Click Save and Close again.
To change the Word Art text itself (not just the styling): double-click the Word Art in Google Slides, or open the Drawing editor in Google Docs. The text input box reappears and you can retype.
Google Slides vs. Google Docs: Word Art Compared
| Feature | Google Slides | Google Docs |
|---|---|---|
| Insert path | Insert → Word art (direct) | Insert → Drawing → + New → Actions → Word art |
| Ease of use | ✅ Easier — direct menu option | ⚠️ Extra steps through Drawing tool |
| Editing | Click to select, edit directly on the slide | Click → Edit → Drawing editor opens |
| Fill color | ✅ Solid, gradient, custom | ✅ Solid, gradient, custom |
| Border | ✅ Color + weight | ✅ Color + weight |
| Shadow / Reflection | ✅ Via Format options | ❌ Not available in Drawing editor |
| Rotation | ✅ Free rotation handle | ✅ In Drawing editor |

Word Art Ideas and Use Cases
- Presentation title slides: large, colorful Word Art as the main title for visual impact.
- Posters and flyers: decorative headings for school projects, event announcements.
- Document headers: stylized section headers in Google Docs reports or newsletters.
- Social media graphics: export the slide/drawing as an image for Instagram, Facebook, or LinkedIn posts.
- Name cards and certificates: large, formatted names on certificate-style slides.
💡 Pro tip: If you need stylized text and professional design without manual formatting, Gamma.com.ai generates presentations with polished typography and design — the AI selects fonts, colors, and sizing that work together, so you don't need Word Art for visual impact.
Conclusion
Word Art in Google Slides: Insert → Word art → type → Enter. Word Art in Google Docs: Insert → Drawing → + New → Actions → Word art → type → Enter → Save and Close. Both let you customize fill color, border, font, and size. Google Slides is simpler (direct menu option); Google Docs requires the Drawing editor. Use Word Art for titles, posters, certificates, and any text that needs visual impact.
FAQs
How do I insert Word Art in Google Slides?
Insert → Word art → type your text → press Enter. The Word Art appears on the slide. Click it to customize font, fill color, border, and size using the toolbar.
How do I do Word Art in Google Docs?
Insert → Drawing → + New → in the Drawing editor, click Actions → Word art → type your text → press Enter → customize → Save and Close. The Word Art is inserted as a drawing in your document.
Can I change the text of existing Word Art?
In Google Slides: double-click the Word Art to re-enter editing mode. In Google Docs: click the Word Art → click the Edit (pencil) icon → the Drawing editor opens → double-click the Word Art text to change it.
Can I add gradient colors to Word Art?
Yes — select the Word Art → click Fill color → choose the Gradient tab → pick a preset gradient or create a custom one with your own colors and direction.
Is Google Word Art the same as Microsoft WordArt?
Similar concept, different features. Microsoft WordArt (in Word/PowerPoint) offers text transforms (curves, waves, 3D effects). Google's Word Art is simpler — flat text with fill, border, shadow, and rotation, but no curved or 3D options.